
How to Install a Fixed Gas Detector Correctly?
Table of Contents
- Assess the Site and Identify the Gas Detection Requirements
- Select a Suitable Detector and Installation Components
- Prepare the Mounting Location and Safety Precautions
- Mount the Detector and Connect Its Power and Signal Wiring
- Commission, Test, and Calibrate the Installed Detector
- FAQS
- Conclusion
- Related Posts
A fixed gas detector is only useful when it can sense gas where a leak may actually travel. That sounds obvious. Yet convenient mounting points, blocked airflow, and overlooked maintenance access can weaken an otherwise sound system. Fixed Gas Detector Installation Considerations should therefore begin with the hazard, not the nearest wall or cable tray.
Safety researcher James Reason wrote, “We cannot change the human condition, but we can change the conditions under which humans work.” His observation, published in Managing the Risks of Organizational Accidents, applies to detector installation: thoughtful placement can reduce reliance on people noticing a leak in time. Consider the gas’s density, likely release points, ventilation patterns, and nearby obstructions. A detector near a ceiling may suit a lighter-than-air gas, while a low-level position may be more appropriate for a heavier gas. Actual site conditions matter; simple rules can mislead.
This guide outlines practical decisions for selecting locations, mounting sensors, routing cables, and commissioning the system. It also explains why manufacturer instructions and a qualified site assessment should guide final placement. A detector should remain reachable for calibration and inspection, but not sit where routine work can damage or cover it. There is no perfect layout on paper. Recheck assumptions against the real room, including changing airflow and equipment. Small details count.
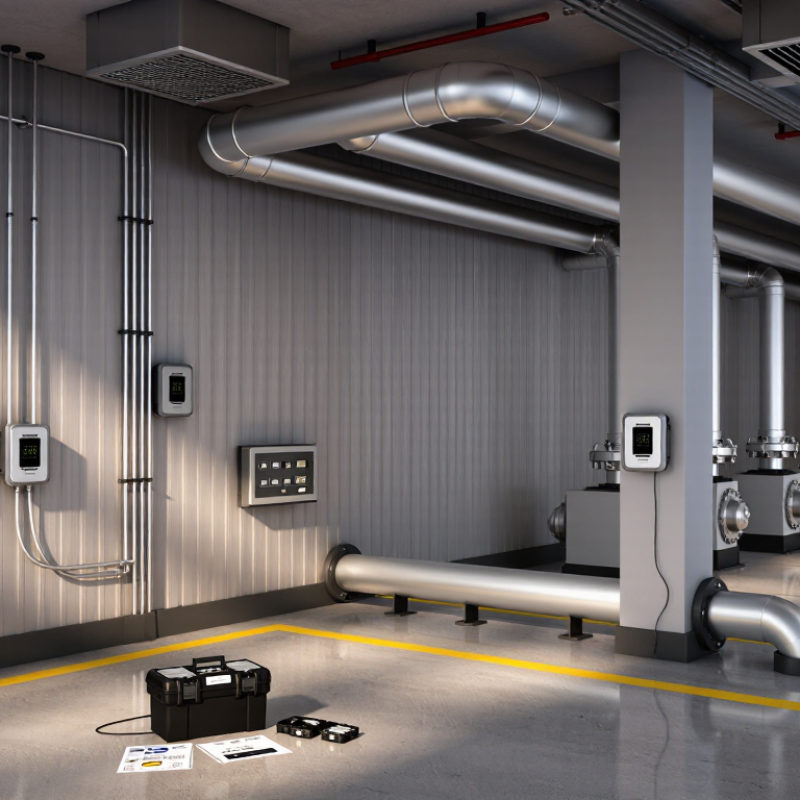
Assess the Site and Identify the Gas Detection Requirements
Walk the area before selecting detector positions. Identify each gas that could escape, including gases released during cleaning, start-up, or maintenance. A methane sensor will not detect carbon monoxide, so match the sensor technology to the hazard. Map the sources. Note valves, pumps, pipe joints, and points where gas could collect.
Watch how air moves. Doors, extraction fans, ducts, and partitions can redirect a leak away from an obvious location. Gas density offers a useful starting point, but it cannot predict movement on its own.
In practice, a tidy floor plan may miss a valve opened only during servicing. Check the actual work area and ask operators about unusual process conditions.
Record temperature, moisture, dust, and corrosive exposure, since these can affect sensor suitability and service needs. Mark occupied workstations, access routes, and spaces where a leak could go unnoticed.
Airflow matters. Define what each alarm should prompt, such as evacuation or a process check, through the site risk assessment. Alarm thresholds and detector coverage should reflect the identified hazards, sensor specifications, and applicable requirements. Have a competent gas-detection professional review uncertain assumptions before installation.
Select a Suitable Detector and Installation Components
Choose a fixed gas detector for the specific gas, likely concentration range, and site conditions. A sensor suited to a cool, dry room may perform poorly near heat, moisture, vibration, or corrosive vapors. Check its operating limits and response characteristics against the process hazards. Small details matter. Consider whether gas may rise, sink, or collect in pockets, then inspect likely leak points and airflow. A drawing helps, but it cannot fully show changing air currents. The drawing may look clear; the actual airflow can disagree.
Select installation components to match the detector and its surroundings. A rigid bracket should hold the sensing head steady and accessible for testing. Use suitable cable, glands, conduit, and junction boxes for the location’s exposure and electrical requirements. A weather hood can protect an outdoor unit, but it must not block gas from reaching the sensor. For remote sampling, choose compatible tubing and keep the run within the detector’s specified limits. Include the correct power supply, controller, alarm devices, and calibration fittings where the system design requires them. Not always obvious. Confirm that maintenance staff can reach the detector safely and replace or calibrate it without removing nearby equipment. Leave enough space for tools. One practical mistake is choosing components from a parts list before checking the mounting location in person.
Prepare the Mounting Location and Safety Precautions
Preparing the mounting location is not a minor task; it shapes what the detector can actually sense. Start by identifying the target gas, likely leak points, and normal airflow. Gas density matters: lighter gases may collect higher, while heavier gases can settle near floor level. Use the detector manual and a site hazard assessment to confirm the recommended height and orientation. Avoid placing it behind beams, in stagnant corners, or directly beside vents that could dilute a leak. Keep it accessible for inspection, calibration, and sensor replacement. Small detail, big difference.
Before drilling, check the wall or support for hidden cables, pipes, corrosion, and vibration. Choose a firm surface, leaving enough clearance to open the enclosure without straining its cable glands. Pause if the location is wet, unusually hot, or exposed to washdown; reassess the protection and placement. Safety comes first. Have qualified personnel review the area, obtain required site authorization, and follow the detector’s installation instructions. Notify affected workers, control ignition sources where applicable, and verify the atmosphere with a suitable portable monitor before work. Isolate electrical circuits when required, and never assume a space is safe because it smells normal. Even a careful plan can miss a draft or maintenance obstruction, so inspect the location again after nearby equipment changes.
Mount the Detector and Connect Its Power and Signal Wiring
How to Install a Fixed Gas Detector Correctly?
Mount the Detector and Connect Its Power and Signal Wiring
Choose the mounting point for the gas, not for convenience. Consider whether the gas rises or sinks, likely leak sources, airflow, and obstructions. Follow the detector’s installation instructions; one standard mounting height will not suit every gas or site. Keep the sensor clear of spray, vibration, and places where air barely moves. Small details matter.
Fasten the enclosure to a rigid surface, then route cables through suitable glands to preserve the enclosure’s protection rating. Keep signal wiring separate from power cables to reduce electrical interference. Use the cable type, conductor size, shielding, and grounding method specified for the system. Connect power and signal terminals carefully; polarity and terminal labels matter. A twisted-pair cable may be required for some outputs. Don’t guess.
Before energizing, compare each connection with the wiring diagram and check for loose strands or exposed copper. Then verify supply voltage and signal behavior at the control panel. The U.S. Bureau of Labor Statistics recorded 5,283 fatal work injuries in its 2023 Census of Fatal Occupational Injuries. That figure is not specific to gas detection, but it underscores why dependable safety equipment deserves careful installation. Even a neat installation can have a blind spot: airflow may change after equipment or partitions are added. Recheck detector placement when the process layout changes.
Commission, Test, and Calibrate the Installed Detector
Commissioning starts with a careful walk-down of the installed detector. Check its identification tag, mounting position, airflow exposure, enclosure, cable entries, and grounding against the approved design. Confirm the supply voltage and signal wiring at both the detector and controller. Then verify the configured gas type, measuring range, alarm thresholds, and fault response. Small mismatches matter. A detector may power up normally while sending the wrong range to the control system. Record the initial readings and configuration before changing anything.
Test the sensor with the procedure specified for that model. A bump test checks that gas reaches the sensor and produces a response; it does not prove measurement accuracy. For calibration, use suitable certified gas, a compatible regulator, and clean tubing. Apply gas at the prescribed flow, allow the reading to stabilize, and adjust zero or span only as instructed. It is easy to rush this part. Residual gas, a leaking connection, or a poorly fitted calibration cap can distort results. Afterward, remove the gas, check that the reading returns to normal, and confirm alarms and fault signals at the controller. Restore any isolated outputs, note the gas concentration and test results, and set the next calibration date. Site conditions change, so a tidy commissioning record is useful—but it cannot replace periodic checks.
FAQS
Walk the work area and identify valves, pumps, pipe joints, and maintenance points. Ask operators about unusual process conditions.
No. Match sensor technology to the hazard. A methane sensor will not detect carbon monoxide.
Watch doors, fans, ducts, and partitions. They can move a leak away from an obvious location. Airflow matters.
Note temperature, moisture, dust, and corrosive exposure. Mark occupied workstations and access routes, too.
Not always. A tidy drawing may miss a valve opened only during servicing. Check the actual work area.
Define clear actions, such as evacuation or a process check. Base them on the site risk assessment and identified hazards.
Compare the mounting, wiring, supply voltage, gas type, measuring range, thresholds, and fault response with the approved design.
No. It confirms gas reaches the sensor and produces a response. Calibration checks measurement accuracy.
Record the gas concentration, test results, and next calibration date. Confirm the reading returns to normal and controller alarms work.
Conclusion
Fixed Gas Detector Installation Considerations begin with understanding the site and the hazards that need to be monitored. Identify likely gas release points, airflow patterns, operating conditions, and the areas where people or equipment may be at risk. Use this assessment to choose a detector suited to the target gas and environment, along with compatible mounting hardware, cables, and signal connections.
Before installation, prepare a stable mounting location and follow appropriate precautions, including isolating power when required. Mount the detector where it can sample the gas effectively, then connect its power and signal wiring according to the equipment instructions. After installation, commission the system by checking connections, confirming that signals reach the monitoring equipment, and testing the detector’s response. Calibrate it as specified and document the results so the system is ready for reliable operation and future maintenance.

Blog Tags: